Thursday, December 29, 2011

Christmas Card - Nativity 3D paper tole style easel card

I made this card in the easel style that stands up on its own. I stamped the image 3 times with versa mark and heat embossed with gold embossing powder. I then cut out several of the elements of the image and built it up into the 3D paper tole scene. I used the Serenditpity stamp set called "Nativity". I used a Spellbinder die cut to make the shape and mounted the scene on gold paper.
This was intricate and fun to do and I gave it to my friend Linda.
I hope you all had a wonderful Christmas or holiday as you observe it.
Take care!

Tuesday, December 27, 2011

Small Red Art Journal - Oriental inspired page

I sponged distress inks for the background on this page and then sprinkled some water on it to make water marks. I stamped many images and and used some outline stickers. I coloured with markers and metallic gel pens. Then I used a white gel pen to do some highlights. It was really fun and freeing creating this 2 page layout.
Have fun with your stash of supplies today! :D

Saturday, December 24, 2011

Zentangle Inspired Art - The Nativity Scene

Jesus is the reason for the season!
While I was working on something yesterday I had an overwhelming urge to draw a zentangle nativity scene. I didn't have much time as I had to go out soon. So I grabbed a black ballpoint pen and a piece of scrap paper and did a quick sketch and filled it with tangles. Today I filled in the hay and then made some shadowing with a pencil.
I hope you enjoy this wonderful season.
Merry Christmas!!!!!!

Wednesday, December 21, 2011

Christmas Card - Poinsettia Frame with Peace, Hope, Love

I still love to give and receive Christmas cards.  I made this card with non-traditional colours. I heat embossed the frame with silver embossing powder, then coloured in with Stampin Up's Bermuda Bay ink and a blender pen. I popped up the sentiment in the middle. The frame is from the Gina K line of stamps.

I finished the inside with a lower weight cardstock insert. I stamped the sentiment and bell and snowflakes using silver metallic ink and Bermuda Bay ink. I sponged Bermuda Bay ink around the edges.
I also decorate the back of each card I make as well as the envelopes.
Merry Christmas!!!!!!
Ho,Ho,Ho!

Monday, December 19, 2011

Christmas Card - Silent Night, Holy Night

This is one of the Christmas cards I made this year. I used the Grace's Frame Cuttlebug folder and the scroll stamp. I coloured with markers and added glaze and stickles to the candle and berries. I sponged some colour onto the frame to give a more vintage look.
Merry Christmas everyone! Have a wonderful holiday season!!!

Thursday, December 15, 2011

Tree Art Journal - White Crayon Resist

Oh my goodness, this was way too much fun!!!!

I took a white crayon to sketch on white paper and drew blind. I couldn't see much of what I was doing which made it so much fun! I just sketched very quickly and freely. Then I painted a wash of colours over the page with watercolour paints to "reveal" my sketch.
It was great to get to see what I had sketched.

Monday, December 12, 2011

Art Journal (Kraft paper) - Delightful

On this page I wanted to make the entire background from different coloured squares by colouring with markers. It took a long time but was fun and calming. Then I stamped the two corner images and the title in black. I then outlined in white gel pen and doodled around the edges for a frame.
I just love the freedom of experimenting in an art journal. You get to do any technique that you want to try just for the fun of it.
Happy creating! :D

Tuesday, December 6, 2011

Art Journal - Bedspread Flowers

I painted these pages in my kraft paper journal. First I applied gesso to the pages. Then I drew the design that is on the bedspread in our 5th-wheel camper. I then painted with acrylic paints. These are very different colours than the actual bedspread but I didn't have all my supplies with me when I was at the camper. I just wanted to use the design of the bedspread in my journal.
It's fun to just look around for all the designs around you and try one of them. Designs are everywhere so you always have inspiration.
Happy painting! :D

Thursday, December 1, 2011

Art Journal - Small Red Journal - Wings

This multi media page spread was done by sponging inks onto the background and then stamping some images. I also added some stickers. I coloured with markers and added some stickles for the glitter. I added one beaded butterfly. Then I wrote the title and words with a black marker and drew in the flight lines of some of the butterflies and the dragonfly.
Would you like to be able to just fly away sometimes? I know I would! :D
Fly Free!!!

Tuesday, November 29, 2011

Zentangle Inspired Art - Branch and Flower

I made this page in my kraft paper art journal. I drew in the partial flower and branch of leaves. Then I drew some tangles in the flower petals. I added colour with markers. It's just a fun little page to have some play time.
I hope you're having fun creating too!

Friday, November 25, 2011

Zentangle Inspired Art - Mandala

Here is another Mandala that I did in my kraft paged journal. This one is done with micron pens in black. I first traced the circular shape with the apple slicer-corer in pencil, then drew my designs with the black micron pen over the shape.
I'd love to hear what you think of this and if you have tried a mandala yet.
Take care! :D

Wednesday, November 23, 2011

Zentangle Inspired Art - Mandala

I created this page in a 6.5" x 4.75" journal that has kraft coloured paper. I used metallic gel pens to draw the mandala.

First I traced around an apple corer-slicer with pencil. I saw this idea of using the apple corer-slicer on Margaret Bremner's blog called Enthusiastic Artist posted January 17th, 2011. When you use the apple corer-slicer it divides your circle into sections. Then you draw with your pens to create your designs. I added a flower shaped bead into the middle of the design to finish it off.

Many thanks to Margaret Bremner for the idea of using this kitchen utensil to trace a circle. Margaret is a CZT (Certified Zentangle Teacher)  and a fellow Canadian from Saskatoon, Saskatchewan, Canada.

Monday, November 21, 2011

Stampscapes - Wintery Mountain Cabin

I made this scene on glossy cardstock cut with the Sizzix Bigz Top Note die. I coloured by stippling dye inks onto the scene which was stamped with Archival Black. I used some markers for some of the colouring too. I think this scene has a chilly winter look to it without snow.
What do you think?
Have a fabulous day!  :D

Friday, November 18, 2011

Altered History Book Art Journal - Woven page

I decided to do some paper weaving in my journal. I first painted the page and then I used my exacto knife to cut wavy lines into the page. I had reinforced the back of the page with black cardstock. Then I cut wavy strips of scrapbook paper in the darker blue colour. I made the strips different widths so that my weaving would not be uniform. Then I wove the strips into the page and glued down all the ends on the back and front of the page. I drew and cut out the heart and glued it on to the page. The back of the scrapbook paper is white so that the back of this page is a black and white woven page.
Lots of fun!
I'd love to hear from you in the comments section!

Sunday, November 13, 2011

Zentangle Inspired Art - with Outline stamps

I did this page in one of my art journals. I first stamped three different Outline stamp flowers and then I stamped the same leaf stamp twice. I drew tangle patterns in all of the stamped images and then I drew in the background. I coloured in the flowers and leaves with prismacolor pencil crayons and blended the colours with odorless mineral spirits.
Have fun with your creative side!

Tuesday, November 8, 2011

Altered History Book Art Journal - Pockets and Tags

This is an interective page that I did by making four pockets from folded pages. I painted all the pages in green metallic acrylic paint, then cut and folded them and glued them into place. I added a medallion that I had stamped on tissue paper to the middle. I added paper doilies that I had painted gold to the corners.
Then I made six multi media tags to go into the pockets on the pages.

This tag was painted and then stamped with a stamp from Le Blanche, made in Germany. I added some lace and edge punched trim in black cardstock. I then added highlights with a white gel pen.


This tag was done at Scrapfest in Kitchener in April 2009 using distress inks and a Tim Holtz stamp.


This tag was painted and stamped and then I drew circles to match the vellum sentiment.


This was stamped with a Stampin Up set called Pocket Fun.


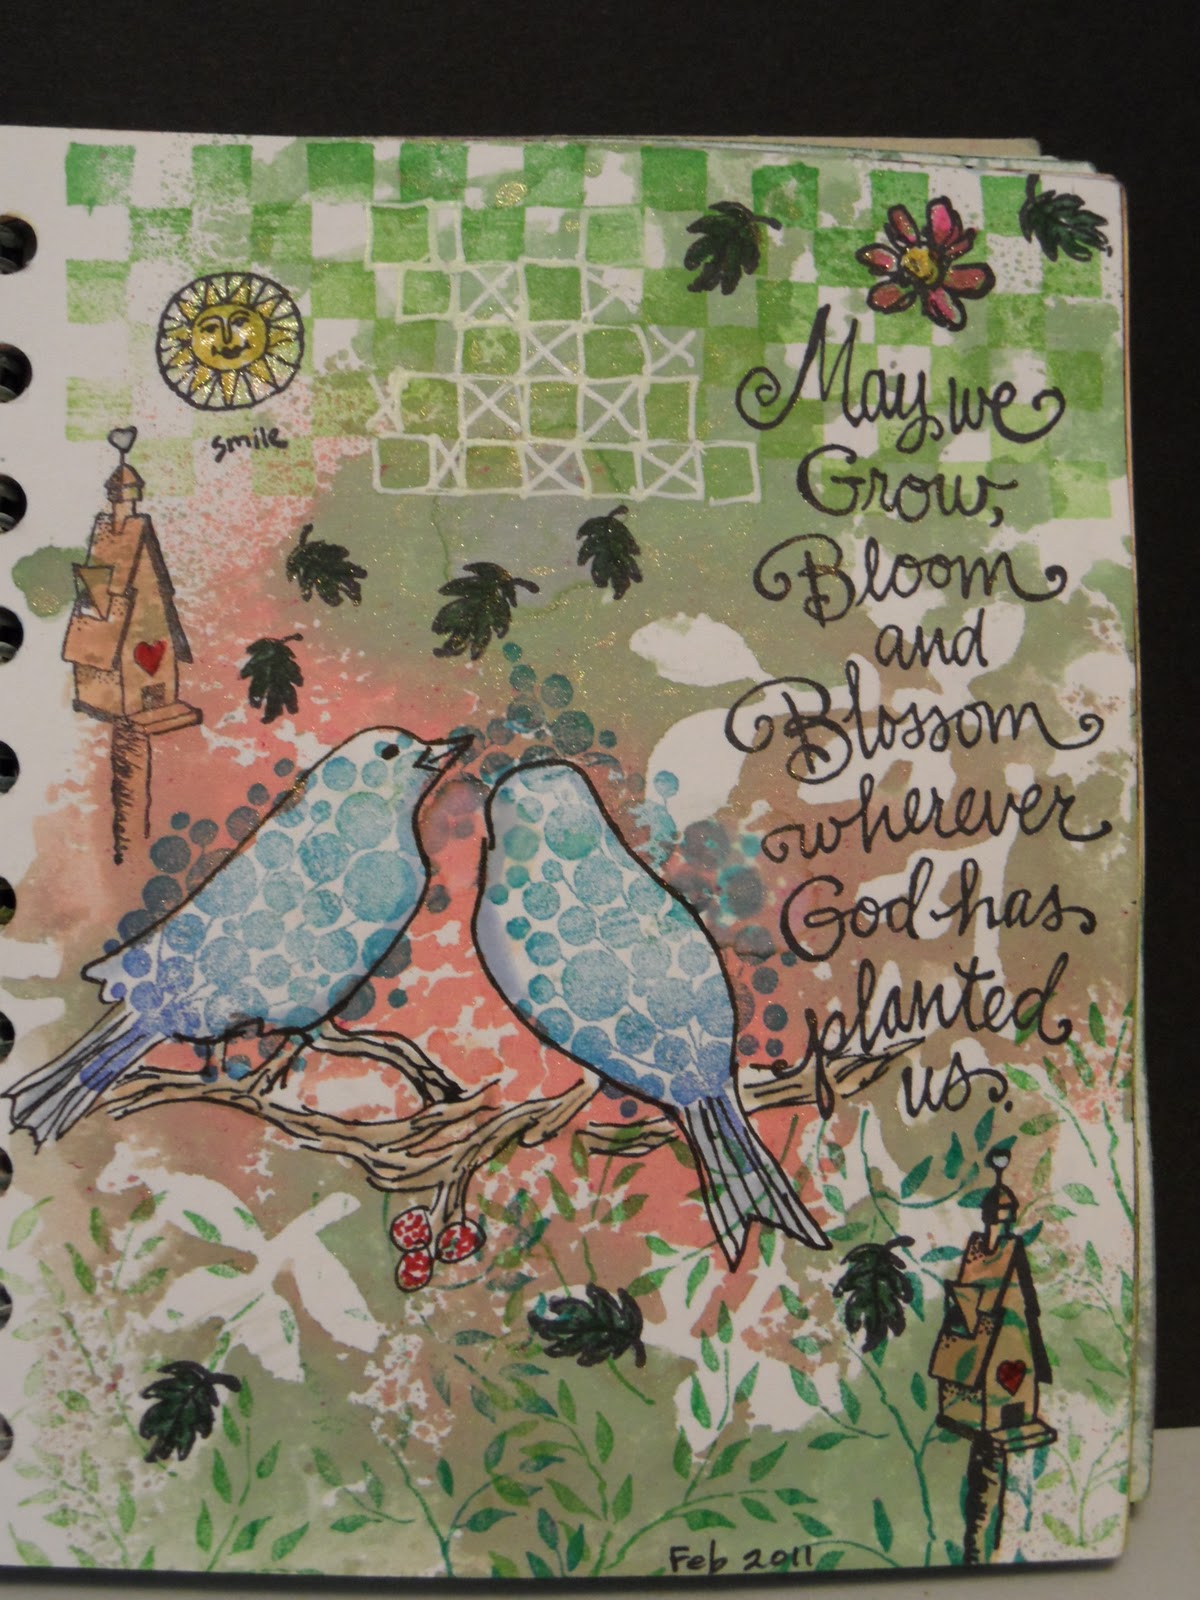
This image was made with a stencil. I sponged ink through the stencil over the acrylic painted background. Then I added stickles to the wings and some on the background.


This tag was painted and sponged and stamped and then I added some cardstock flowers. I then stamped over some of the flowers.
I added fibers and ribbons to all of the tags to match the colours in each tag.
This project was time consuming, but a lot of fun!


Thursday, November 3, 2011

Zentangles Inspired Art - Flowers and Ribbons

This was inspired from the book I bought entitled "Totally Tangled" by Sandy Steen Bartholomew. I was trying out some of the tangle patterns in her book and this is what I came up with. I decided to add some colour to give it some pizzaz.
Tangling is so much fun. Why don't you give it a try!

Guess what? This page was featured on Sandy Steen Bartholomew's blog on Tues., Nov. 8, 2011! Her blog is Beez in the Belfry. How exciting! :D

Monday, October 31, 2011

Happy Halloween!

Happy Halloween!
I did this scene using some clear stamps and two tree stamps from All Night Media. I sponged the colours on the background and coloured in the figures with some markers. It looks darker in real life than this photo shows. It was so much fun to do a Halloween scene!
Trick or treat!

Friday, October 28, 2011

Altered History Book Art Journal- King Birds

This fantasy page was created by first preparing the background with gesso, acrylic paints and texturing layers. Then I drew the birds and flowers on newspaper, cut them out and collaged them onto the prepared background. The sun/moon was stamped with black ink. The flowers and birds were painted and then I drew the stems and leaves and crowns and all other details with a black marker. Some highlights were added with a white gel pen.
Take care and have fun!

Tuesday, October 25, 2011

Altered History Book Art Journal and Title Page

This is the History textbook that I studied from in Grade 11.  My name and grade form are still on the first page and some notes I made are in the book.  No, it was not my favourite subject and I don't know why I kept the book, but I decided to use it to make an altered art journal. First I removed several pages from each signature in the book because there were almost 500 pages! As I use the book I glue 3-4 pages together to make them stronger for altering with paint or ink or collage or whatever medium I am using.


This is the first page in the altered History book. I painted and stamped and created many layers for the background. Then I stamped my title and wrote some journaling and did some highlighting with a white paint marker.
It is really fun to paint right over the text that I used to study all those years ago! Try to find an old book that you can alter and start playing!
Have a creative day! :D

Thursday, October 20, 2011

Art Journal - Small Red Journal

This is another page in my small red journal. I inked and stamped the background and then added the butterfly ATC (Artist Trading Card) onto the page. I got the ATC at Scrapfest from the Local King Rubber Stamp booth.


For this page I painted some circles over some stencil work in the background. Then I drew some funny faces. This page makes me laugh. Do you know some of these people? Do you ever feel like some of them look? *LOL*


I was showing my friend Linda the technique of colouring on an acrylic block with watercolour crayons, then spritzing it with water, then stamping the colour onto the paper for the background on this page. It looked like water to me when I had finished showing her, so I coloured, cut out and added some of the chararcters from SU's Fishy Friends to make an underwater scene.

Have fun trying different techniques in your art journal.


Saturday, October 15, 2011

Art Journal - Small Red Journal


This journal page has many different techniques going on. I just used this page to experiment with things and it slowly evolved. First I sprayed through a stencil with inks on the left page and then turned the stencil over onto the right page to soak up the ink left on the stencil. Another day I painted on some leftover paint over the page. Another day I stamped with the end of a toilet paper roll just for fun. Finally I stamped some images and glittered them up with Stickles glitter glue and stamped some background hearts. Voila! Complete.


This page has many layers of inks and paints and markers. If you click on the image and make it larger, you can see some of the stamps in the background. I just love all the colours of Fall.


Maui Dreams. This page had a background of bright paints, then a layer of gesso to tone it all down, then stamps and markers to colour the images. I've been to Maui once and would love to go back again some day. In the meantime, I'll keep dreaming.
Have a lovely dreamy and creative day! :D

Thursday, October 13, 2011

Tree Art Journal - Zentangle Tree


I have been wanting to start a tree art journal for some time now. Last night I chose the journal and started to draw. I had seen a similar style of this tree drawing on flickr so I decided to give it a try, but change it to my version. I stayed up too late last night (big grin) and then finished it this morning. I drew the circles in with different zentangle type patterns and added colour with pencil crayons. I used a sharpie marker to draw the design.
So now my tree journal has begun and this is the first page. I have lots of ideas for different trees and I'm excited to experiment with new techniques and interesting tree creations.
Have a happy and creative day! :D

Monday, October 10, 2011

Zentangle Inspired Art - Sun

I used a sun stamp for the sun face and then extended the rays out with a marker. Then I drew the zentangle patterns in each section of the sun's rays. The yellow colour was added last.
I hope you all have a sunny day!
Have you tried some relaxing doodling yet? It's fun!

Friday, October 7, 2011

Art Journal - More pages from small red journal

I sprayed ink through a stencil for the first page in this book and then turned to a new page and stamped down the stencil which had lots of ink on it onto this page. So I had the negative of the stencil to work with. Then I used other rubber stamps, inks and markers to create this page.

For this page I sprayed ink through some lace to create the background. Then I did some stamping and sponging and drawing of the border to complete the page.

Working in an art journal gives you the freedom to experiment and I love to try new techniques. I took a paper napkin and mod podged the front and back of it to this page. Then I drew a freehand border with a black marker pen and then sponged acrylic paint through an onion bag for the green border. Lots of fun!
I hope you try some new experiments in your art work today.
Happy creating! :D


Thursday, September 29, 2011

Small Red Art Journal - where it all began


My art journaling adventures began in this little 4.5"x 5.5" journal. I had bought this book to make a scrapbook album for a friend and I had ended up using a different one for her album. When I discovered art journaling, this little book fit the bill. I've had a great time playing and experimenting with techniques in this journal. I decorated the front cover with some stickers and flowers I had in my stash.


This is the first page in the journal. I had such fun using a stencil, homemade spray inks, stamps and inks and doodling to create this page. It is so freeing to just create and not worry about being as precise as you need to be when stamping cards. There are no rules in art journaling. Your journal is your own and you can experiment and create anything you want.


I love all things Halloween, but I don't send Halloween cards. I have collected a few Halloween stamps and I love to create scenes with them. So my journal is a perfect place to do this. I love this page. Can you see the ghosts and mummy? Click on the photo to make it bigger and check out the tombstone and ghosts, and mummy. The little Frankenstein just makes me laugh!


Sometimes I do a scene across two pages in the journal.I had the idea for this page in my head for a while and then searched for just the right magazine pictures to create it. I painted the background and collaged the pictures in place and painted the rest. Then I used some stickles to make the water sparkle.
I have 6 different art journals on the go as well as a junk journal that I'm having a blast doing.
Creating art is such great therapy for the soul!

Tuesday, September 27, 2011

Stampscapes - Tropical Tri Fold Shutter Card


To make this tri fold card I first made the black cardstock base and then cut out all the pieces of white glossy cardstock to fit each section. Then I stamped the scene with the pieces of white glossy cardstock laid out in the formation they would be on the card. I added the colour with stipple brushes and dye inks. I added highlights with a white gel pen.
Click on the photo to see a bigger picture.
Happy Stamping!

Thursday, September 22, 2011

Probus Art Show

The program for our Probus group in August was an Art Show. We were asked to show the members what we create. The following photos show my table all set up for the show at the Brantford Golf and Country Club. I showed my Stampscapes scenic art, my Zentangle art and my Art Journals. It was fun to get to tell about my art and  listen to all the reactions and interest.


I'd love to know what you create. Leave me a message and tell me about your artistic adventures!

Tuesday, September 20, 2011

Stampscapes - Northern Lights

I did most of this scene when I went to Green Bay, Wisconsin where we have family and my great stamping friend Pat A. I loved one of her scenes that showed the northern lights and I wanted to give it a try. This was done on glossy cardstock and stippled with dye inks. Highlights were added with gel pens. What a fun time I always have with Pat! It is great to get together with stamping friends and play.
Enjoy your day! :D

Sunday, September 18, 2011

Zentangles Inspired Art - Circle Flowers

For this piece I lightly traced some circle shapes in pencil and then drew in the tangle flower patterns with my Micron 01 pen. I added shading with a regular pencil and a blending stump.Then I decided that I wanted to colour it, so I made a copy of it and coloured it in with markers. Below is the finished coloured piece.

I kept the original drawing so that I could copy it again if I needed to.
Have a wonderful day and try a Zentangle! It's fun and relaxing.
Take care! :D